Usar este paquete como biblioteca
Ejecute este comando:
Con Flutter:
$ flutter pub add dialog_alert_transitionEsto agregará una línea como esta al pubspec.yaml de su paquete (y ejecutará un implícito):
flutter pub get
dependencies:
  dialog_alert_transition: ^2.0.0
Como alternativa, el editor podría admitir archivos. Consulta la documentación de tu editor para obtener más información. flutter pub get
Importarlo
Ahora, en tu código Dart, puedes usar:
'package:dialog_alert_transition/dialog_alert_transition.dart';dialog_alert_transition es una librería que es para usar dialogo y notificación con efectos de transición.
esta entrada está usando la version 2.0.0 y para futuro quizás cambie y mejore deberán consultar la biblioteca de Dart en su página pub.dev
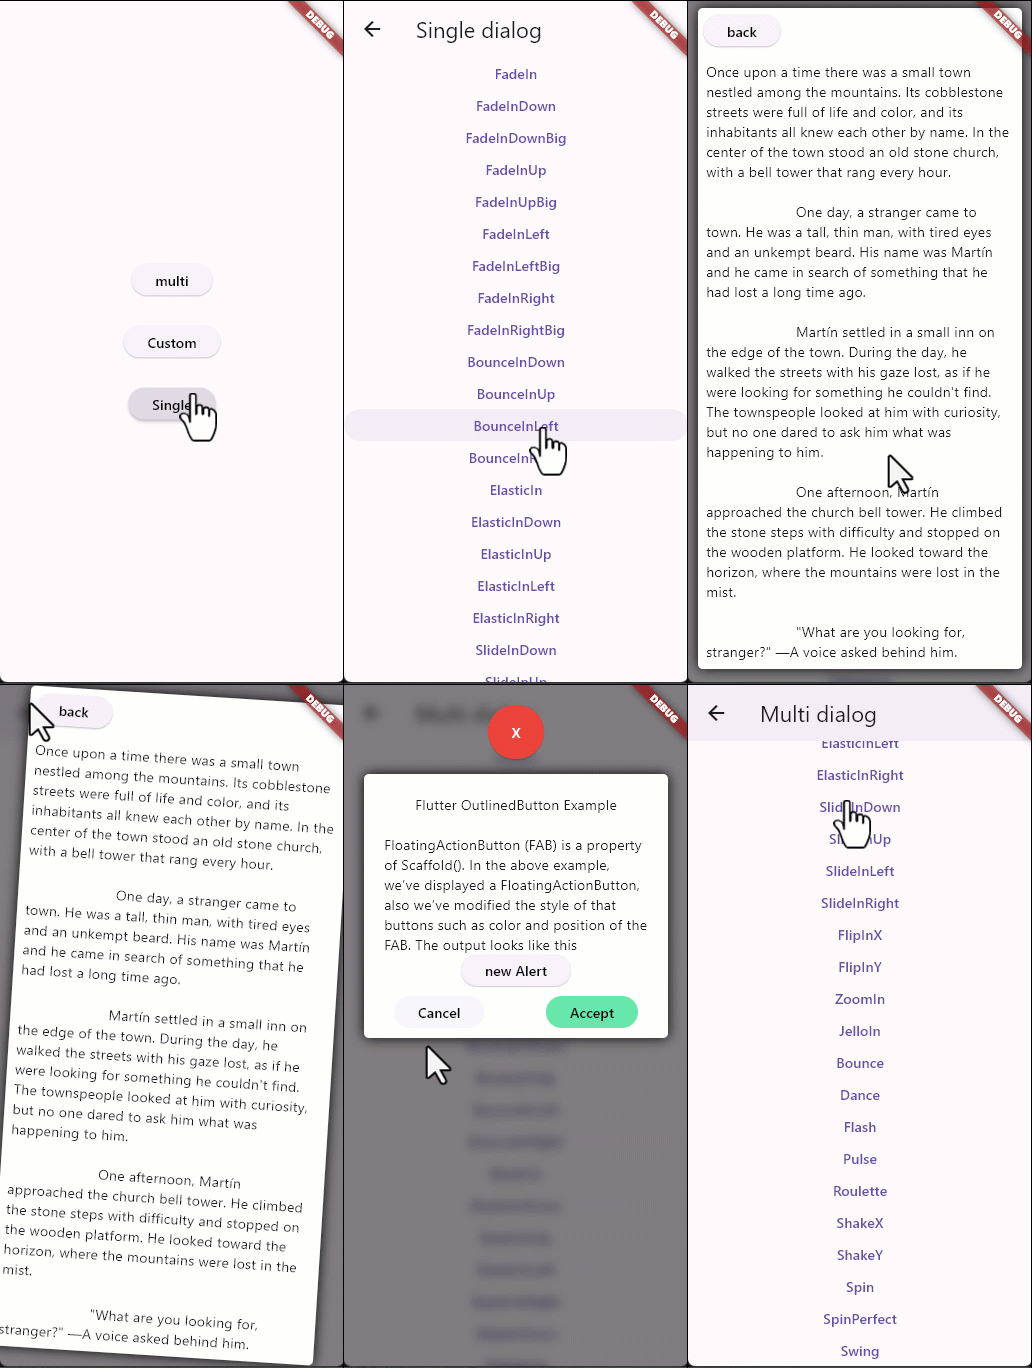
Como sabemos existen muchos plugin de dialogo, pero este es un plugin creado por mi para la comunidad. es libre para su uso general.
Características
Abrir el dialogo con distintas transiciones tales como:
- FadeIn,
- FadeInDown,
- FadeInDownBig,
- FadeInUp,
- FadeInUpBig,
- FadeInLeft,
- FadeInLeftBig,
- FadeInRight,
- FadeInRightBig,
- BounceInDown,
- BounceInUp,
- BounceInLeft,
- BounceInRight,
- ElasticIn,
- ElasticInDown,
- ElasticInUp,
- ElasticInLeft,
- ElasticInRight,
- SlideInDown,
- SlideInUp,
- SlideInLeft,
- SlideInRight,
- FlipInX,
- FlipInY,
- ZoomIn,
- JelloIn,
- Bounce,
- Dance,
- Flash,
- Pulse,
- Roulette,
- ShakeX,
- ShakeY,
- Spin,
- SpinPerfect,
Usar un controlador de dialogo:
El controlador de dialogo esta guardado en la variable pública. controlDialogGO
Ejemplo
 dialogAlertTransion(
                      context: context,
                      title: const Text('Flutter OutlinedButton Example'),
                      transitionType: transitionType.Bounce,
                      content: const Column(
                        children: [
                          Text(
                              'FloatingActionButton (FAB) is a property of Scaffold(). In the above example, we’ve displayed a FloatingActionButton, also we’ve modified the style of that buttons such as color and position of the FAB. The output looks like this'),
                        ],
                      ),
                      );
multi dialogo:
Para enviar un cuadro de diálogo personalizado, debe crear un token y hacer referencia al controlador de diálogo con el nombre de variable controlAlertGo y así poder cerrar el cuadro de diálogo
ejemplo:
//Muy importante generar
int token = controlAlertGo.generate();
   dialogAlertTransion(
                      context: context,
                      title: const Text('Flutter OutlinedButton Example'),
                      content: Column(
                        children: [
                          const Text(
                              'FloatingActionButton (FAB) is a property of Scaffold(). In the above example, we’ve displayed a FloatingActionButton, also we’ve modified the style of that buttons such as color and position of the FAB. The output looks like this'),
                          ElevatedButton(
                            onPressed: () {
                              int token = controlAlertGo.generate();
                              dialogAlertTransion(
                                context: context,
                                title: const Text(
                                    'Flutter OutlinedButton Example'),
                                content: Column(
                                  children: [
                                    const Text(
                                        'FloatingActionButton (FAB) is a property of Scaffold(). In the above example, we’ve displayed a FloatingActionButton, also we’ve modified the style of that buttons such as color and position of the FAB. The output looks like this'),
                                    ElevatedButton(
                                      onPressed: () {
                                        controlAlertGo.close(
                                            token: token, context: context);
                                      },
                                      child: const Text('back'),
                                    ),
                                  ],
                                ),
                                alignment: Alignment.topCenter,
                                blur: true,
                                transitionType: transitionType.ElasticIn,
                                duration: 1000,
                                backgroundColor: Colors.black,
                                token: token,
                                closeFunc: () {
                                  setState(() {
                                    stas = 'New  String';
                                  });
                                },
                              );
                            },
                            child: const Text('new Alert'),
                          ),
                        ],
                      ),
                      alignment: Alignment.topCenter,
                      blur: true,
                      duration: 1000,
                      backgroundColor: Colors.black,
                      transitionType: e,
                      closeFunc: () {
                        setState(() {
                          stas = 'New string';
                        });
                      });
Posición:
Cambie la posición del cuadro de diálogo con las posiciones derecha, izquierda, de abajo hacia arriba de forma predeterminada tiene el valor de 0.
ejemplo:
dialogAlertTransion(
                      top: 15,
                      left: 25,
                      bottom: 25,
                      rigth: 50,
                      context: context,
                      title: const Text('Flutter OutlinedButton Example'),s
                      content: const Column(
                        children: [
                          Text(
                              'FloatingActionButton (FAB) is a property of Scaffold(). In the above example, we’ve displayed a FloatingActionButton, also we’ve modified the style of that buttons such as color and position of the FAB. The output looks like this'),
                        ],
                      ),);
Cuadro de diálogo personalizado:
Para acostumbrarse a su diálogo, debe pasar un token generado y así poder manipular el controlador de diálogo a su manera
ejemplo:
TextButton(
                onPressed: () {
                  int tk = controlDialogGO.generate();
                  dialogAlertTransion(
                    transitionType: e,
                    token: tk,
                    context: context,
                    designer: true,
                    alertWd: customWidget(token: tk),
                  );
                },
                child: Text(e.name),
Desenfoque o efecto blur:
Habilitar es un valor true o false.
ejemplo:
dialogAlertTransion(
                      blur: true ||false,...);
Para ver el ejemplo completo:
import 'package:dialog_alert_transition/dialog_alert_transition.dart';
import 'package:flutter/material.dart';

class singleAlert extends StatefulWidget {
  const singleAlert({super.key});

  @override
  State<singleAlert> createState() => _multiAlert();
}

class _multiAlert extends State<singleAlert> {
  String stas = 'text old';

  @override
  Widget build(BuildContext context) {
    return Scaffold(
      appBar: AppBar(
        title: const Text('Single dialog'),
      ),
      body: Center(
        child: ListView(
          children: [
            for (transitionType e in transitionType.values) ...[
              TextButton(
                onPressed: () {
                  int token = controlAlertGo.generate();
                  dialogAlertTransion(
                      context: context,
                      title: const Text('Flutter OutlinedButton Example'),
                      content: const Column(
                        children: [
                          Text(
                              'FloatingActionButton (FAB) is a property of Scaffold(). In the above example, we’ve displayed a FloatingActionButton, also we’ve modified the style of that buttons such as color and position of the FAB. The output looks like this'),
                        ],
                      ),
                      alignment: Alignment.topCenter,
                      blur: true,
                      duration: 1000,
                      backgroundColor: Colors.black,
                      transitionType: e,
                      token: token,
                      rejectString: 'Close alert',
                      acceptString: 'Confirm this alert',
                      rejectFunc: () {
                        print('this function use is reject alert');
                      },
                      acceptFunc: () {
                        print('this function use in accept alert');
                      },
                      closeFunc: () {
                        setState(() {
                          stas = 'new string';
                        });
                      });
                },
                child: Text(e.name),
              ),
            ]
          ],
        ),
      ),
    );
  }
}
